Sage X3 Workflows: How to Email Reports and Notifications Automatically
Sage X3 Workflows: Automate Your Business Processes and Procedures As Sage X3 consultants, when we help Sage X3 customers get up and running, one...
4 min read
Benjamin Partout Tue, Mar 14, 2017

Our team of Sage X3 consultants get a lot of questions from our Sage X3 customers. Some questions are more common than others and we make an effort to share these common Sage X3 questions to help others get the most out of their Sage X3 investment. We encourage ongoing training and offer support for Sage X3 because most users will not take advantage of the functionality of Sage X3 unless they take advantage of our resources. One common thing that users often misunderstand is that they can take take advantage of modifying the software without knowing how to write code. Join our webinar to learn more Sage X3 tips and tricks. Register HERE.
Here are a few examples of common do-it-yourself functionality in Sage X3:
In this article, we will review another feature of Sage X3 that often overlooked is the ability to add controls to a given field in the system.
Under the setup module, you can find a function called control tables.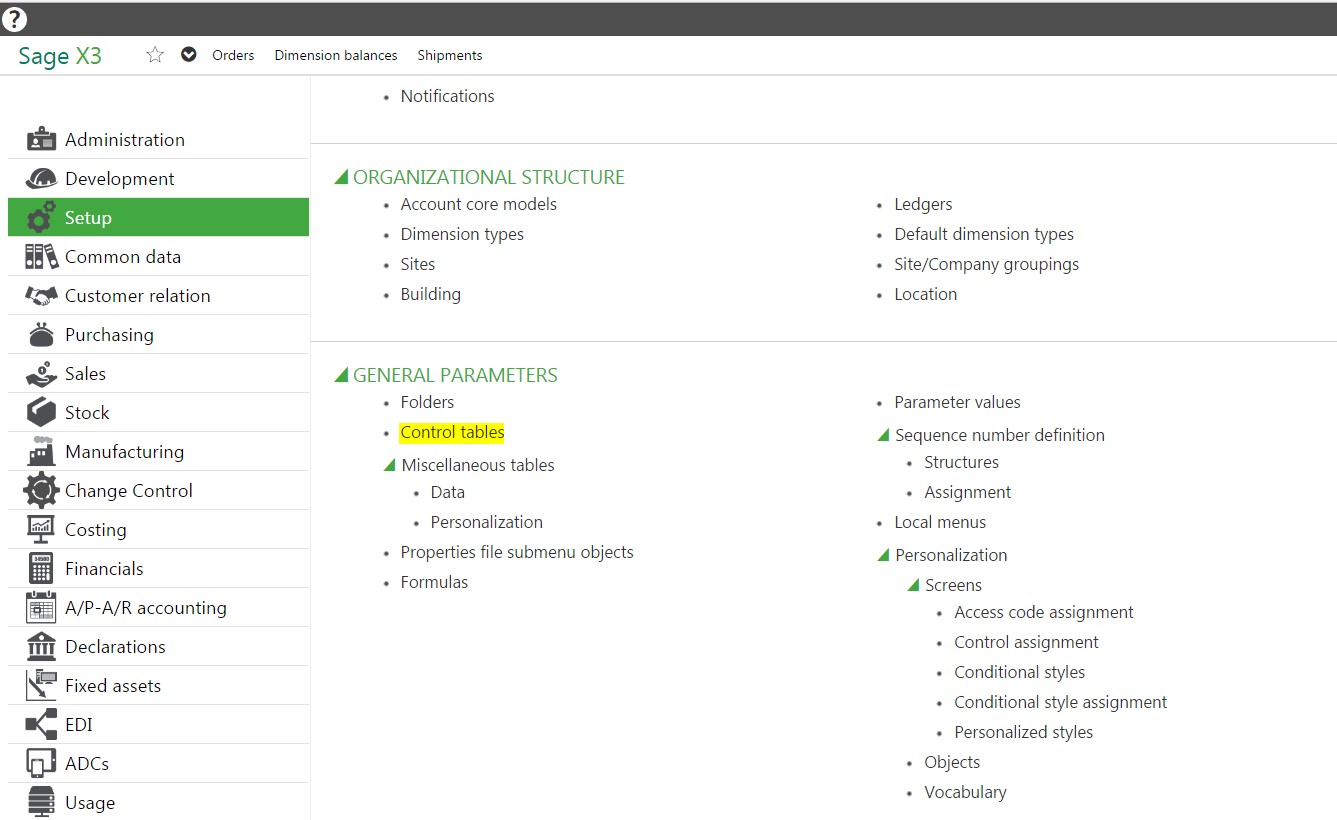
Developers eventually realized that they were constantly adding custom logic to standard or custom fields using the control action, so they decided to offer a function where a user could simply add controls to a field through an easy-to-use interface.
You can add any control to any field on a screen. Be aware, however, that sometimes the standard logic will take over after your control is evaluated and it might be overriding your configuration. This particularly holds true for controls you would add to a standard field.
Contact Us to Request a Sage X3 Demo
For example: You might want to add a control on the currency field on the sales order screen. Sage X3 is a true multi-currency software that comes configured with most currencies out of the box. Without deleting currencies one by one, you can still control which values can be used within a particular currency field.
In our scenario, because you do not deal with Canadian dollars or Hong Kong dollars, you can restrict the values allowed in a currency field by selecting the below information:
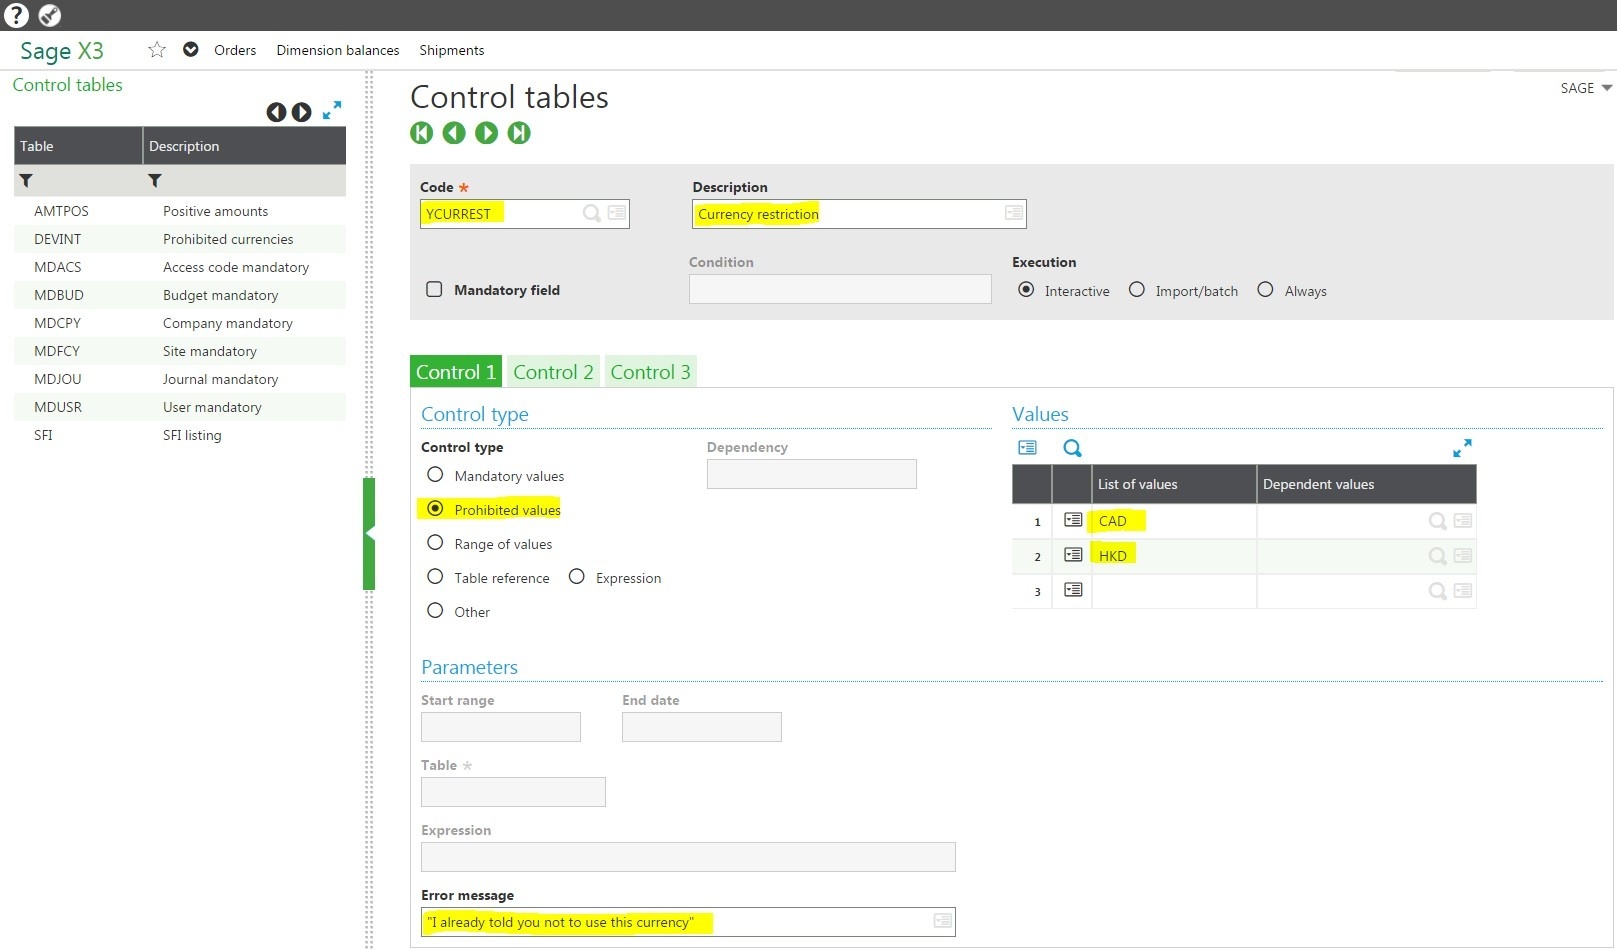
A few things to note on this screen above:
You could just have as easily decided to use the mandatory values if my scenario was to only be able to choose CAD and HKD as the currencies available.
Using the range of values option, if you create a numeric field where the field is allowing to enter a 4-digit number, you can also decide to let the user only enter a range from 1 to 5150 instead of allowing all numbers from 1 to 9999.
What’s left is assigning the control code we just created to the field want that control to happen.
This will require that you know which screen and field you want to assign this control to. (As a reminder, you can figure out the screen code and the name of the field by placing your cursor in the field and holding down ESC while pressing F6.)
Here is the screenshot of that shortcut on the currency field of the sales order.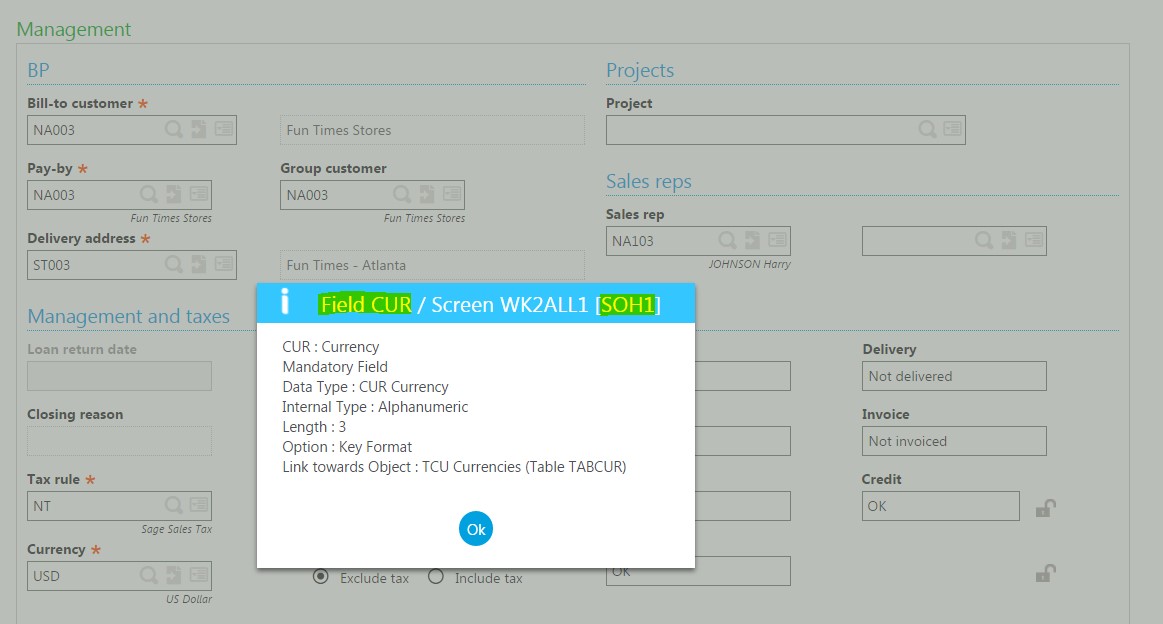
Remember to always use the field code as highlighted and the screen code in the square brackets, not the one starting with a W.
To make the association between the control that you just created and the field on the screen, there’s a dedicated function called control assignment: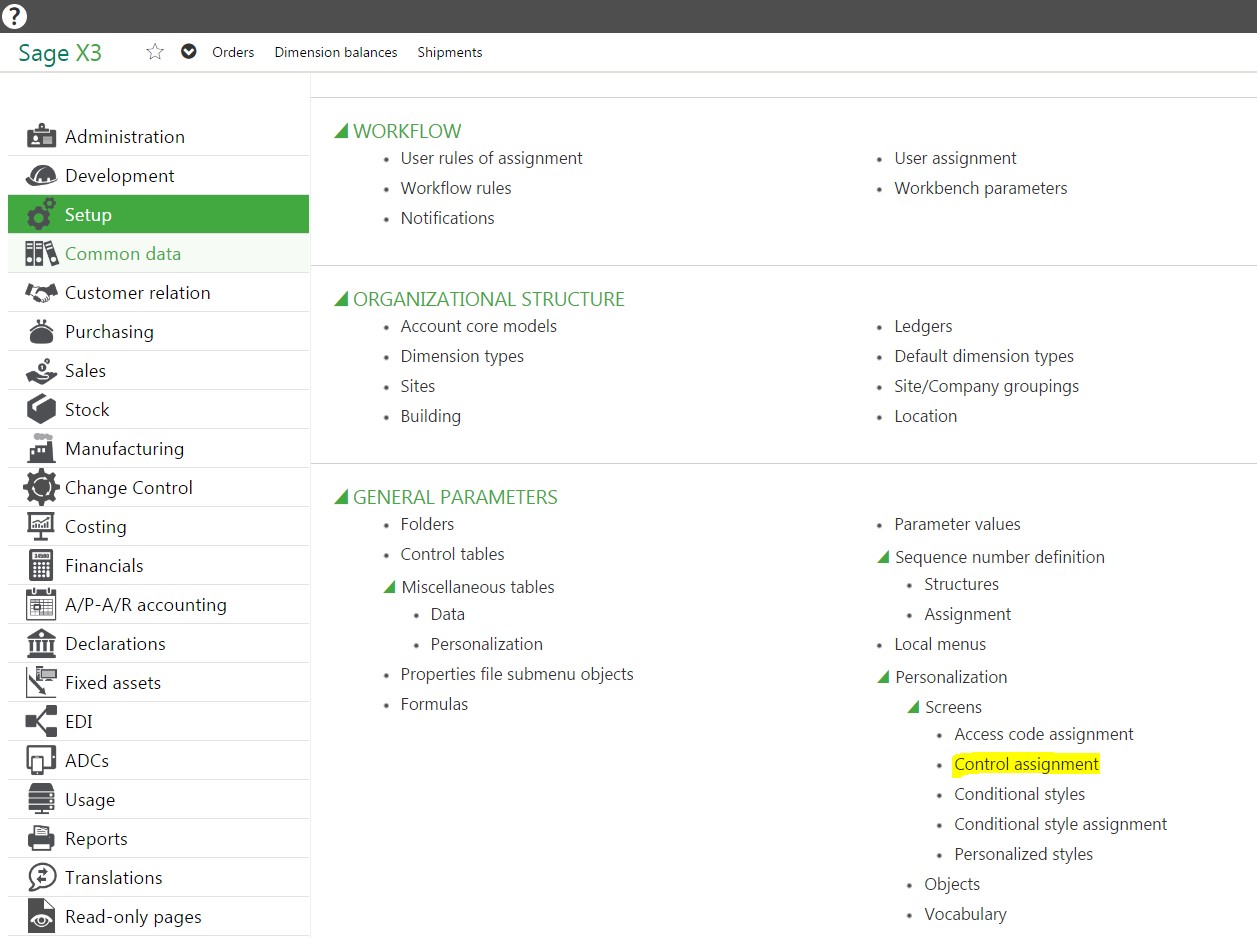
You can then plug in the values we wrote down when we viewed the technical data of the field as follows:
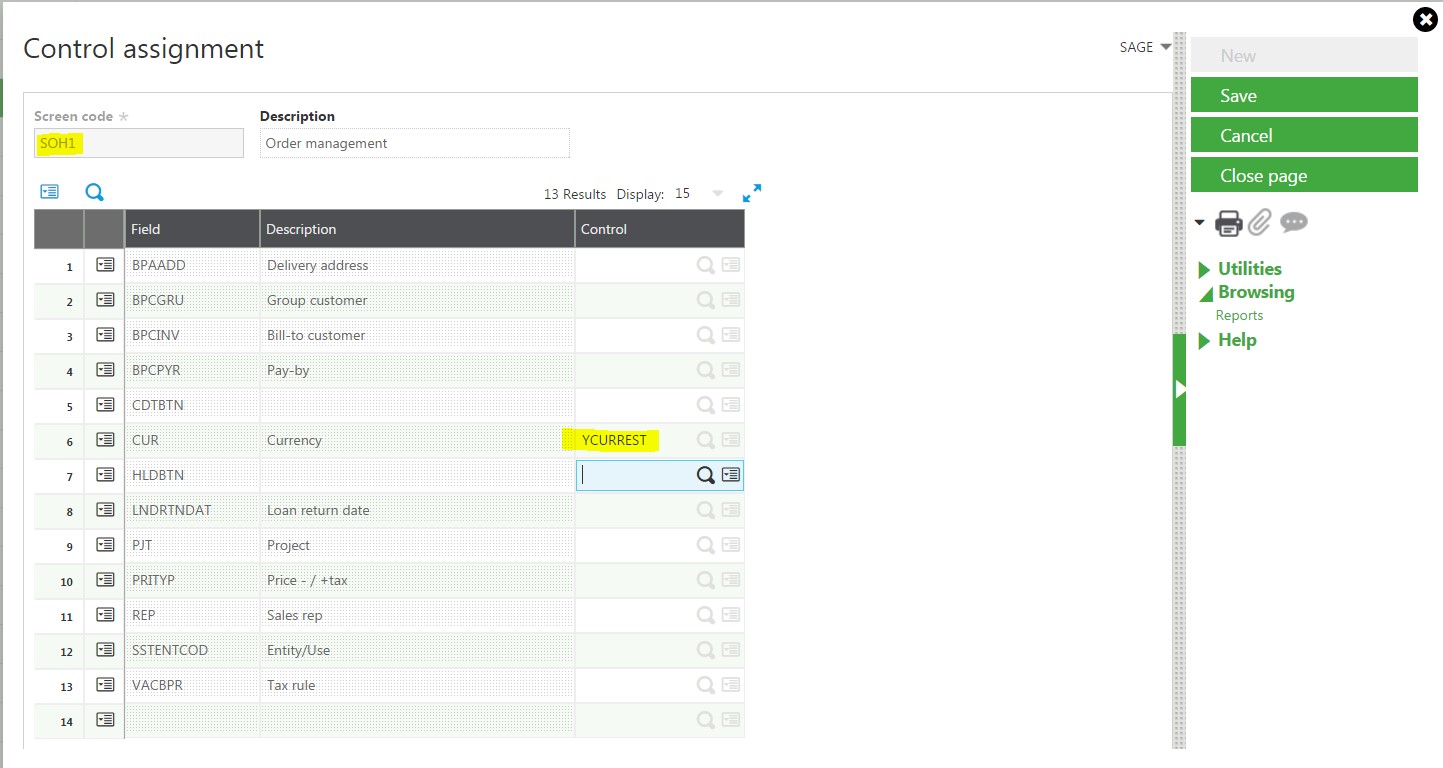
Because the sales order is an entry transaction driven screen, after you save the above, you’ll have to validate the entry transactions you use in your system.
Let’s assume that you’re only using the ALL entry transaction. You need to go to Setup > Sales > Entry transactions > Orders and then validate the ALL entry transaction.
Now, if you go to the sales order and enter the CAD currency, you should get a blocking control that prevents you from selecting it and giving you an error message when you try.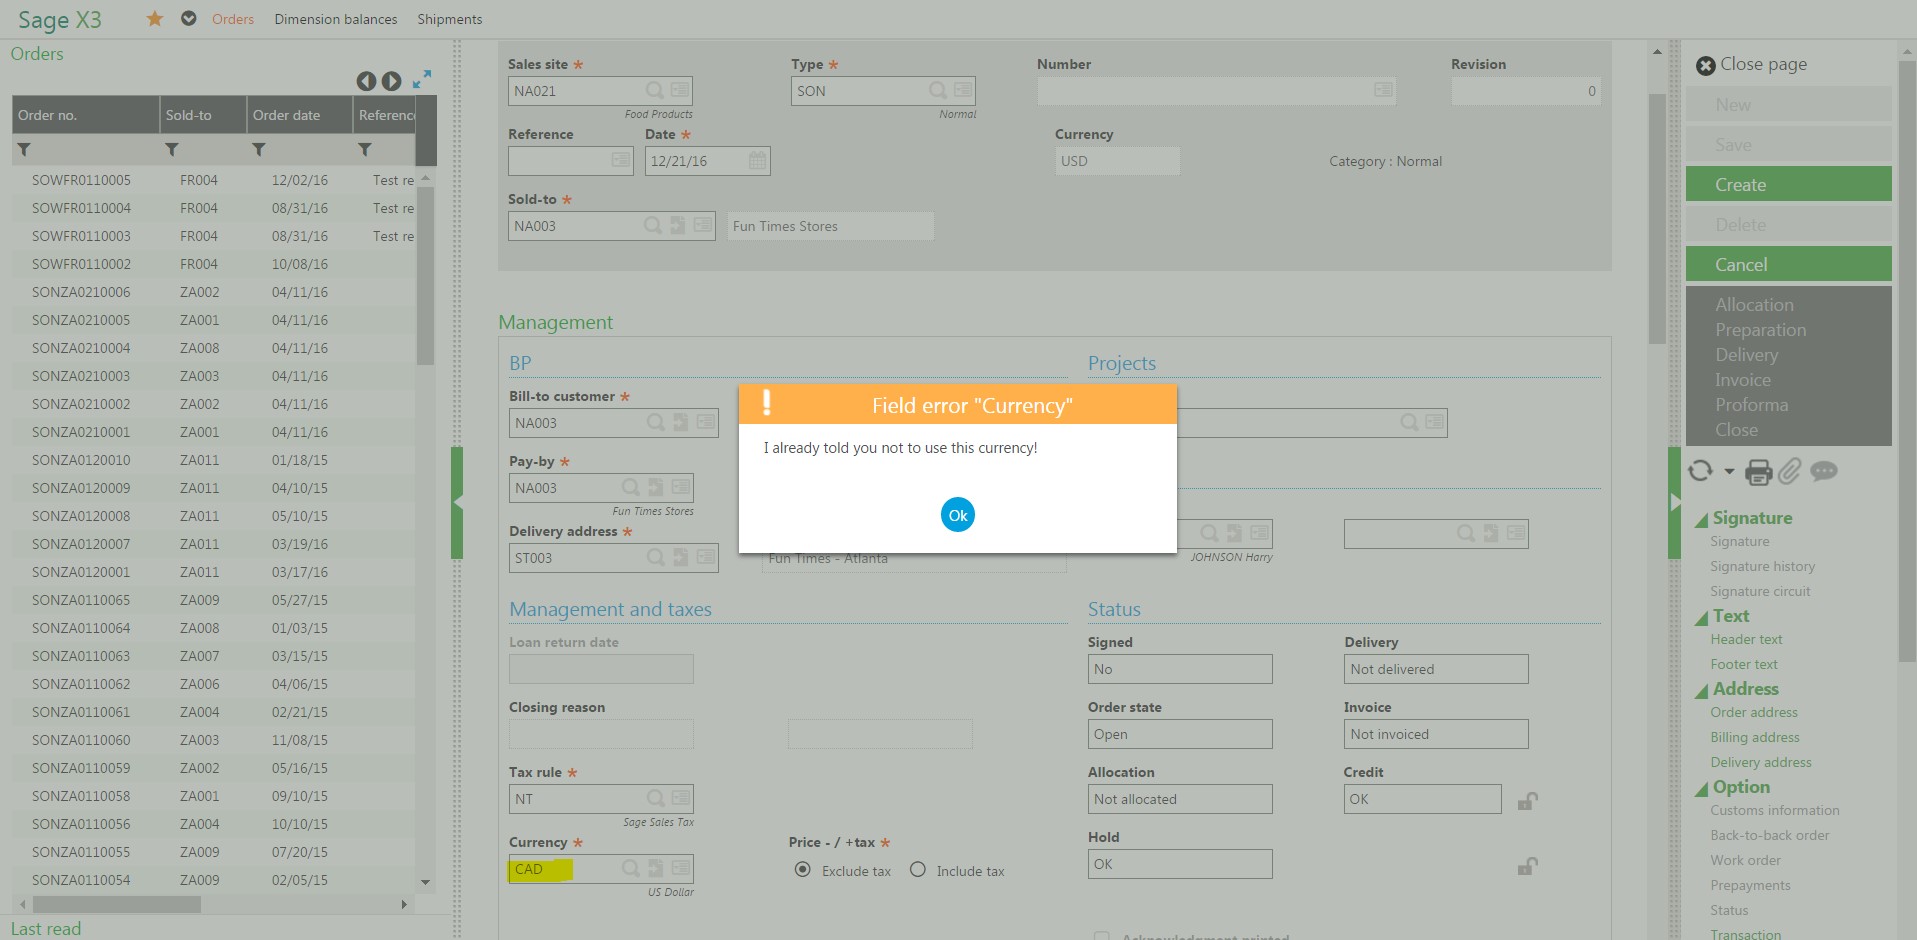
These are only a few examples of how you can use this functionality to add controls to your fields in Sage X3.
Please contact us if you have questions or need additional pointers to add controls to your field!
Register for this free webinar: 5 Sage X3 Tips, Tricks & Tactics to Make Your Life Easier
Talk to Us About Sage Software Support
Southeast Computer Solutions is based in Miami, Florida, and has additional operations in Mexico. For over 30 years, we have positively impacted the success of small and mid-sized businesses with effective business management implementations that improve our clients’ operations. We listen, we are accessible, and we care. Learn more by visiting our website or calling 305-556-4697.
Another version of this blog was posted on Southeast Computer Solutions blog by Benjamin Partout - Adding Controls to Fields in Sage X3
Sage X3 Workflows: Automate Your Business Processes and Procedures As Sage X3 consultants, when we help Sage X3 customers get up and running, one...

Why are Sage X3 Consultants and Customers Excited about Update 9? Earlier this year, Sage got everyone excited about the new features in new release...

Work smarter, not harder in your Sage X3 system with these tips from an experienced Sage ERP X3 Consultant. Sage ERP X3 offers quite a bit of...