Sage 100 ERP Consultant Tip: How to Add a Crystal Reports Parameter
Sage 100 ERP Consultant Tip: How to Add Parameters in Crystal Reports Question: Mike we are Sage 100 users and own Crystal Reports, we would like...
2 min read
Mike Renner Tue, Sep 26, 2017

Question: Mike, we own Sage 100 and have built several Custom Crystal Reports. How do we add these reports to the Sage 100 menu?
Answer: There are 7 steps to follow that we've provided below. First, let's clarify how to control the accessibility of Crystal Reports between those employees accessing Sage 100 (end-users). When one end-user builds a Custom Crystal Report, that end-user has ownership of it and it's easy to maintain. It's usually distributed by the creator of the report whenever others in the company need it. This isn't always convenient when the creator of the report isn't easily accessible and others need to access the report. Once you decide it's time to make Crystal Reports available to other end-users of Sage 100, then it makes sense to set up each report in the "menu task" feature. The menu task feature in Sage 100 allows end-users to simply access and run the report in Sage 100 without having to access Crystal Reports. Of course, you will want to make sure there are security parameters set up so you control who will have access to run the report.
NOTE: We advise that you consult with your certified Sage 100 ERP consultant before making any changes to your Sage 100 ERP system. If you don’t currently work with a Sage 100 consultant, contact us and we are available to help. Sign up for more helpful Sage 100 tips & tricks below!
1) The first step is to create the Crystal Report and save it with custom.rpt at the end, and make sure the name of the report is less than 30 characters.
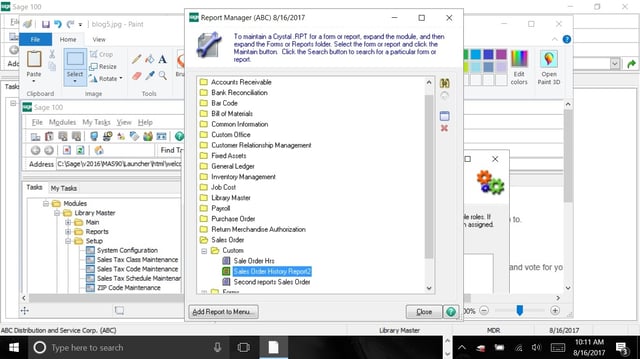
2) Go to Library Master>Setup>Report Manager.
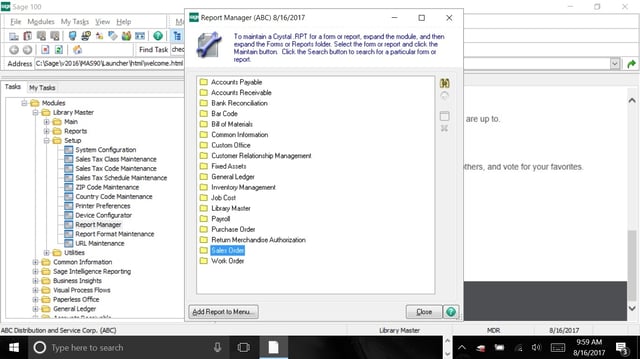
3) Click on the Module you want to add, in the case Sales Order and Click Add Report to Menu.
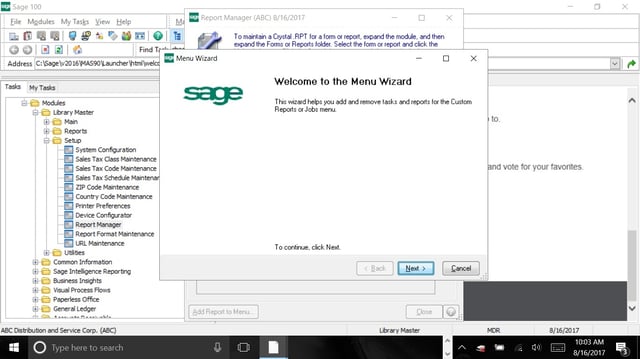
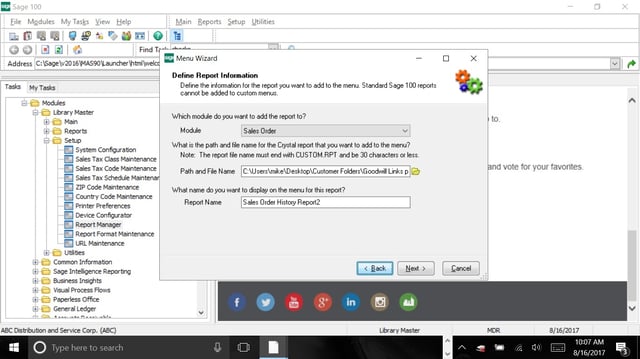
4) Click Next on the Report Wizard and then select the Module, Path, Report Name then click Next.
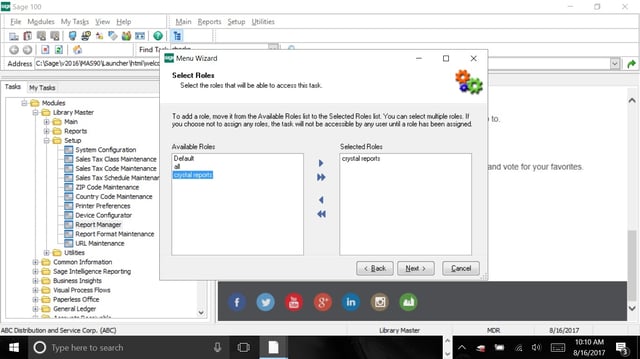
5) Select the Role you want to use, this will let you assist to only specific Users that you want to be able to run the report.
6) Click Finish and the report can be accessed from the Module Custom Reports menu
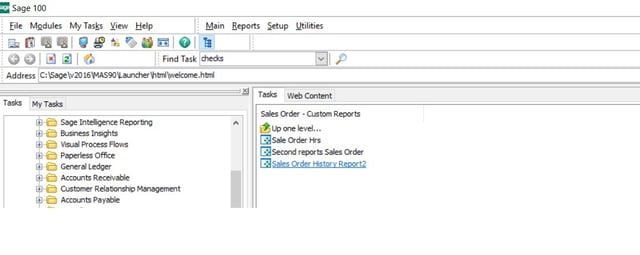
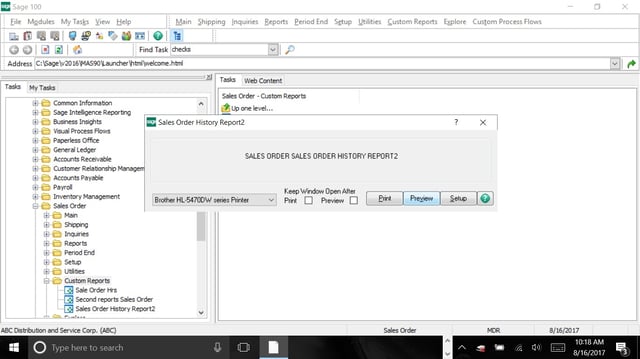
7) The report can be run by clicking the task, setting the date and clicking print or preview.
Written by Mike Renner: Partner of WAC Solution Partners - Greater Los Angeles, a Sage 100 ERP consultant and support provider based in Indio, CA.
Mike is an expert on ERP and fund accounting and supports Abila Fund Accounting and Sage 100 ERP with over 25 years in the accounting software industry. Mike is also a Sage Certified Trainer and a recognized leader in the design, implementation and support of ERP systems, including Sage.
Specialties: Sage 100 ERP (formerly Sage MAS90 / MAS200), Abila MIP Fund Accounting™, Acumatica, QuickBooks Pro Advisor

Sage 100 ERP Consultant Tip: How to Add Parameters in Crystal Reports Question: Mike we are Sage 100 users and own Crystal Reports, we would like...

Sage 100 Consultant Tip - Add a Custom User Define Field (UDF) to a Sage 100 Panel with Customizer and Report on it with Crystal Reports Question: ...
As Sage 100 ERP consultants, resellers and solution providers, we get a lot of questions from our clients on how to use Sage 100 ERP (formerly MAS...